


As October arrives, most gardeners assume their hostas are ready for a hands-off winter rest. However, this critical month is when intentional care makes the biggest difference in spring vigor. The right October interventions protect crowns, eliminate pest and disease harbors, and ensure your shade plants emerge lush and full next year. Whether your hostas are in-ground or growing in containers, these practical strategies will set the stage for the most impressive growing season ahead.
Stop Feeding and Reduce Watering Immediately
When temperatures drop in October, your hostas naturally shift into dormancy mode. The first mistake gardeners make is continuing to apply nitrogen-rich fertilizers. Feeding at this time triggers soft, tender leaf growth that cannot harden before winter arrives, wasting precious energy your plant needs for root and crown development. Instead, halt all routine fertilizing in early fall and let your plant settle into rest.
Similarly, adjust your watering schedule now. Summer heat demands consistent moisture to keep those large leaves plump and resilient, but autumn rainfall and cooler conditions dramatically reduce soil evaporation. Check the top 2-3 inches of soil before watering. If it feels damp, skip watering altogether. Only water during genuine dry spells to prevent roots from desiccating completely before the ground freezes. Once soil freezes in late fall, stop watering entirely until spring thaw begins.
Wait for the First Frost Before Cutting Back Foliage
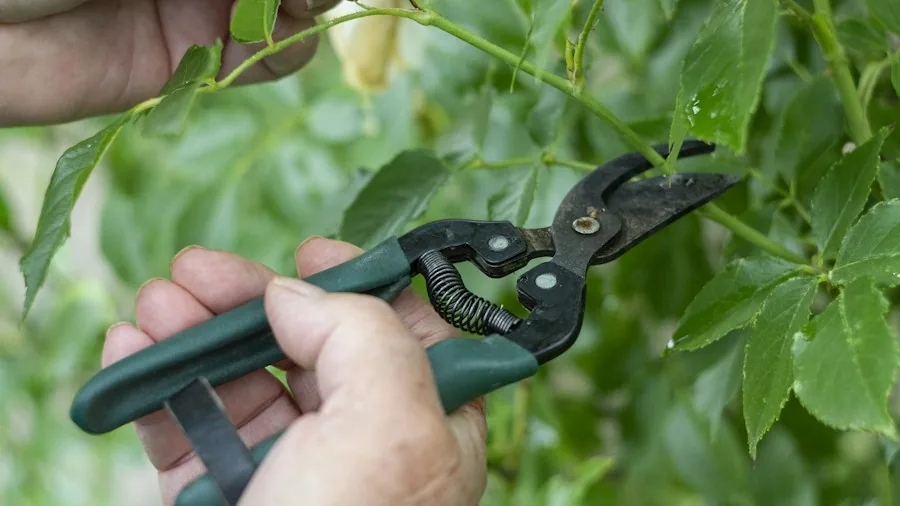
Yellowing leaves may look messy, but resist the urge to cut them back early. As long as leaves retain any green or yellowish-green color, they are actively converting sunlight into energy and transferring reserves down into roots for next spring’s growth. Trimming too soon starves the plant and results in weaker crowns and smaller leaf development when growth resumes.
Wait until leaves are clearly dead, typically after the first hard frost. Then use clean, sharp pruners to cut leaf stems back to roughly 1-2 inches above the ground. Wipe your pruning tools with isopropyl alcohol before and after to prevent disease spread. Take care not to slice into the crown or damage the dormant eye buds sitting at soil level. Different varieties transition at different rates, so thin-leaved types may yellow sooner than thick-leaved cultivars like Frances Williams.
Remove All Dead Leaves and Debris
This cleanup step is one of your most powerful defenses against spring problems. Fungal spores love to overwinter in decaying hosta foliage, and collapsed leaves create the perfect winter home for slugs and snails. Once leaves have died and you trim them back, rake up every bit of dead leaf material, spent flower stalks, and surrounding litter from your beds.
If removed foliage looks healthy and disease-free, it can go into your compost pile. However, if you notice leaf spots, crown rot, or pest damage, dispose of it in the trash to prevent spreading pathogens to other garden areas. This thorough cleanup dramatically reduces your risk of slug egg clusters hatching just as tender shoots emerge in spring, and it minimizes fungal pressure on your plants.
Consider Dividing Established Clumps in Moderate Climates
If you live in zones 6-8 with a longer fall, October offers an ideal window for dividing overgrown hosta clumps. Divided sections benefit from 4-6 weeks to settle before hard freezes arrive. Northern gardeners in zones 3-5 should postpone division until spring when the soil thaws.
To divide, wait until foliage begins yellowing, then carefully lift the entire clump with a garden fork. Using a sharp serrated knife, slice the crown into sections, ensuring each division has a healthy cluster of roots and 2-3 dormant eye buds. Replant divisions immediately at their original depth, firm the soil, and water thoroughly. Hostas only require division every 3-5 years when centers become crowded or hollow, so this is not an annual task.
Apply Mulch at the Right Time to Prevent Frost Heave

A winter mulch layer protects delicate crowns from frost heaving, where freeze-thaw cycles lift shallow roots out of the ground and expose vulnerable crown tissue to freezing air and drying winds. However, timing matters: applying mulch too early traps moisture and warmth against the crown, encouraging fungal rot. Wait until nighttime temperatures consistently drop and topsoil begins to freeze before adding a 2-3 inch layer of loose organic mulch like shredded bark, pine needles, or leaf mold. Apply mulch around the perimeter of each plant rather than directly over the crown center.
Since trimming foliage makes crowns invisible, insert durable garden markers directly beside each crown before mulching. Labeling prevents accidental spade damage during early spring digging and helps you track special cultivars. As an extra safeguard, take a photo of marked locations in case markers shift during winter.
Protect Potted Hostas from Extreme Cold
Container-grown hostas face higher winter risks than in-ground plants because potted soil lacks the insulating mass of earth, leaving roots vulnerable to rapid temperature swings that can crack pots and kill dormant crowns. In zones 3-6, move dormant pots into an unheated garage, shed, or cold frame where temperatures remain between 25-40 degrees Fahrenheit after foliage dies back and soil cools.
If indoor storage isn’t available, group pots tightly together against a warm house foundation, wrap the exterior with bubble wrap or burlap, and top-dress with straw. Check potted soil monthly during winter and apply a small amount of water if soil becomes bone-dry to prevent root desiccation. Like your other container plants before frost hits, hostas deserve extra protection during dormancy.
These six October tasks require just one or two afternoon work sessions, but they deliver tremendous returns in spring vigor, disease prevention, and healthy crown development. When your hostas break dormancy next April, you will see exactly why taking time now matters.






Write Your Review
No reviews yet. Be the first to share your experience!